......in which Scotty Lee asked ......
Here's the reply and verbal description.......ScottyLee wrote:.. do you have any pics from when you built the blind. i.e. the frame only before the material?
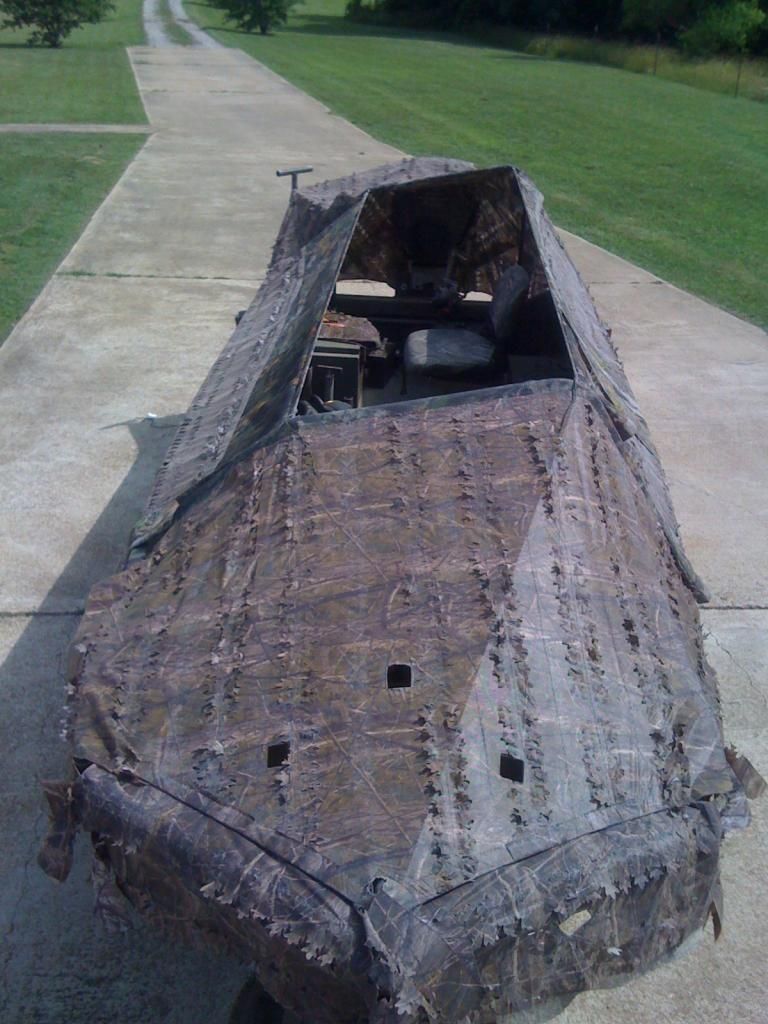
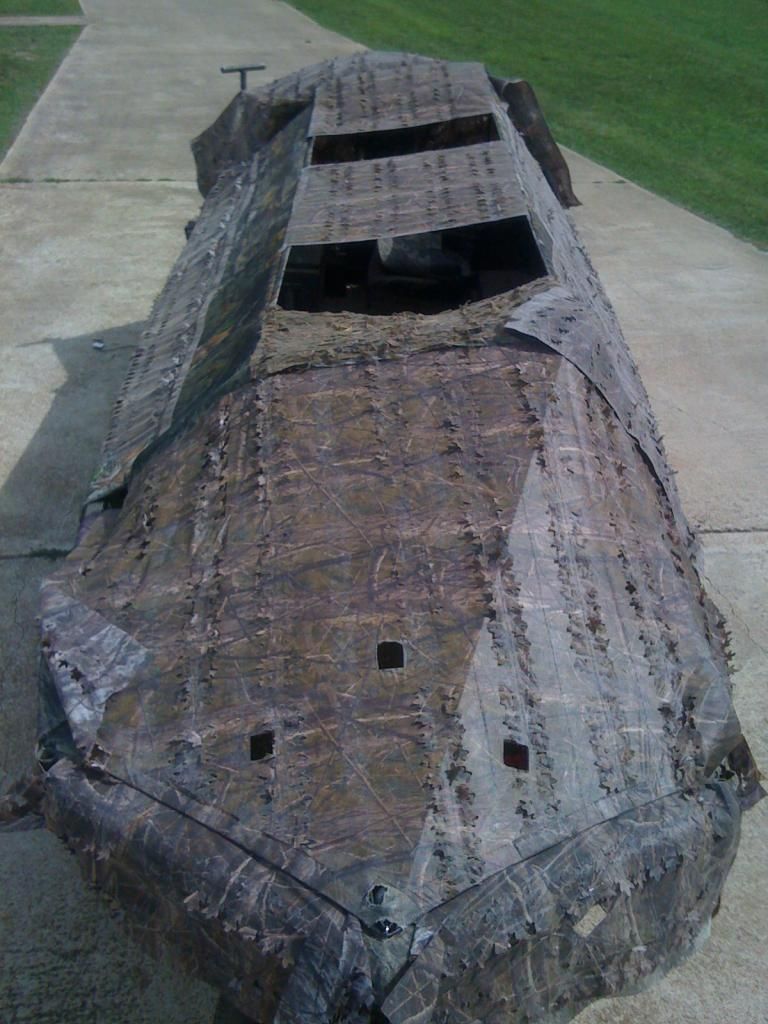
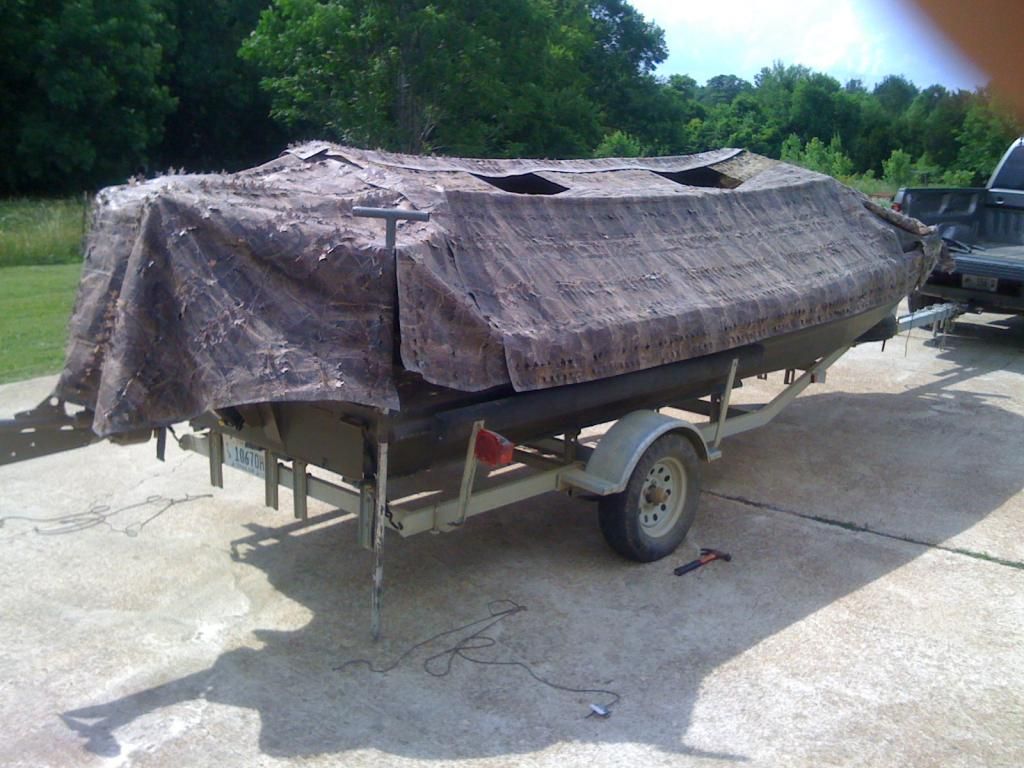
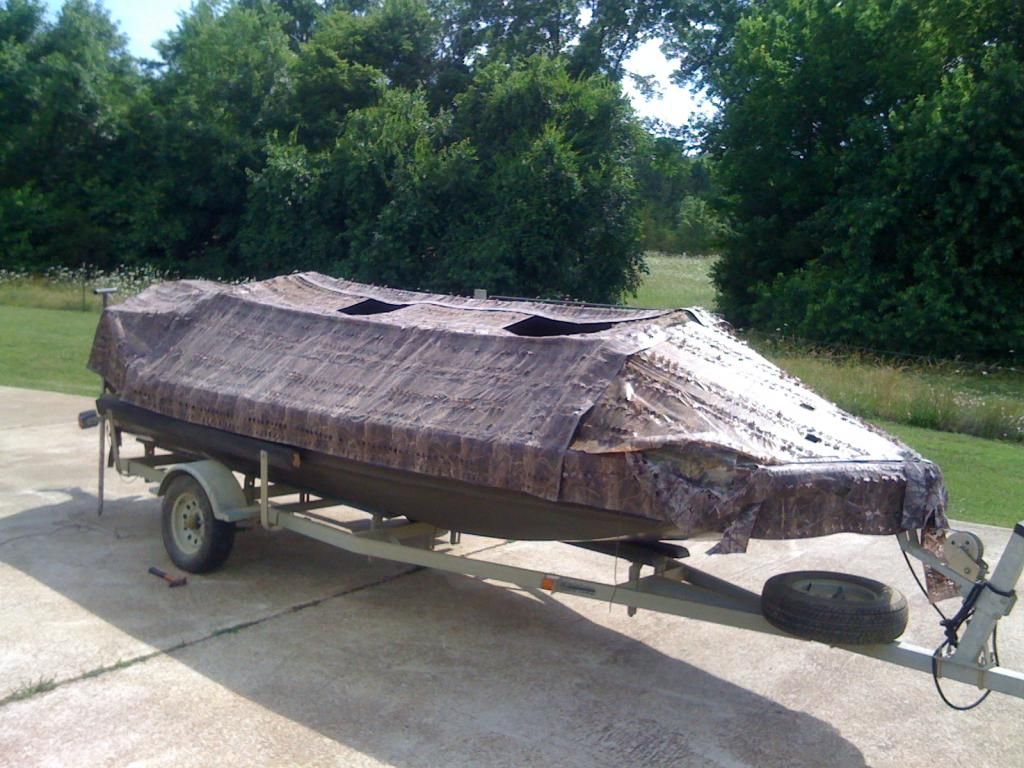
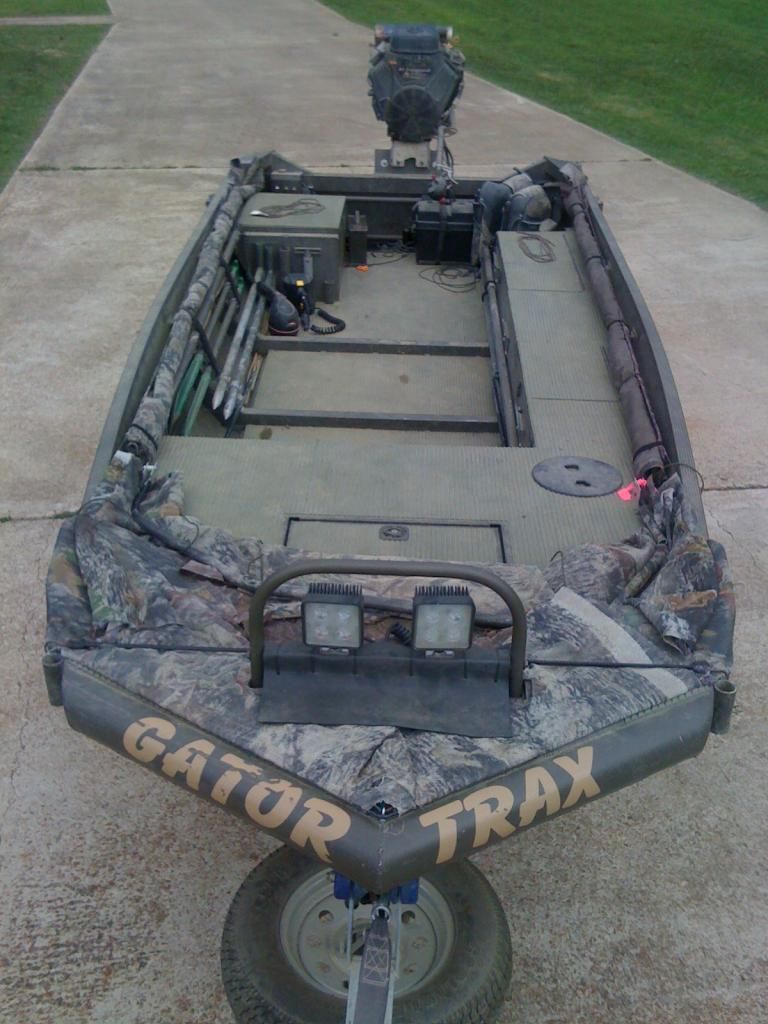
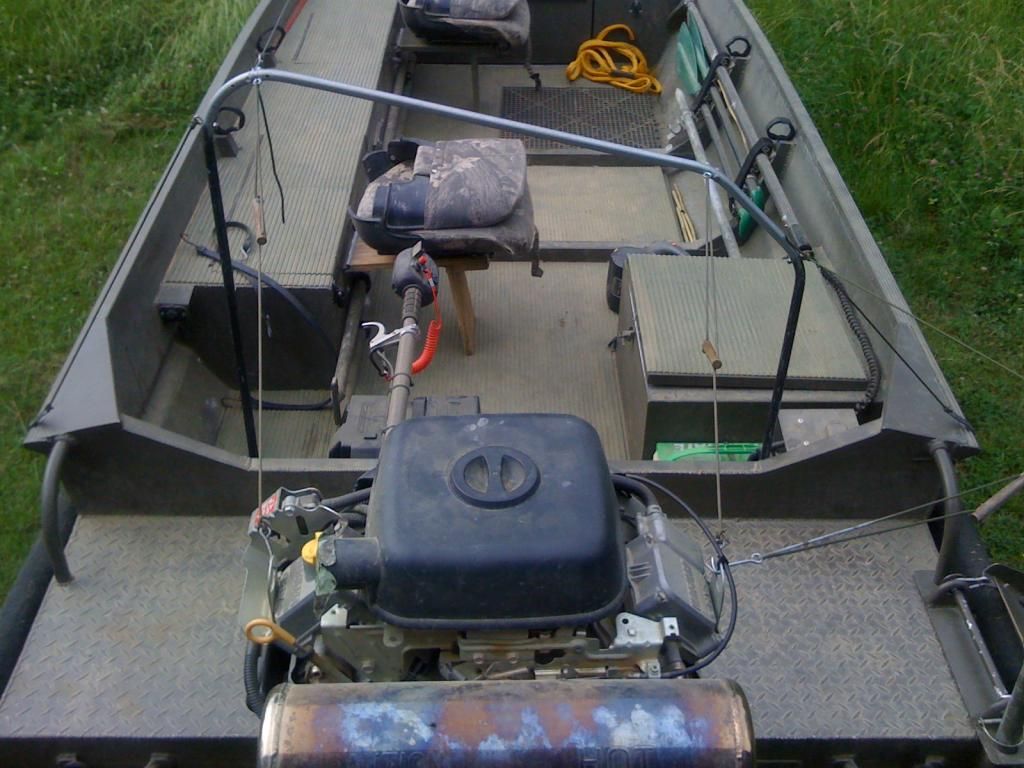
So, almost 2 years later........I have been re-working the nets and while I had them off the boat I 'thought it would be a good opportunity to finally show the basic framework of the blind. And it really probably costs under $75 for this boat, BTW.Anatidae wrote:You know....I was going to take some 'in-progress' photos just for this purpose, but we picked the rig up the day before Thanksgiving - I didn't have a whole lot of time to get a blind concept finalized, then executed.........we needed to be USING that boat. So, I didn't take the photos that would show the skeleton.
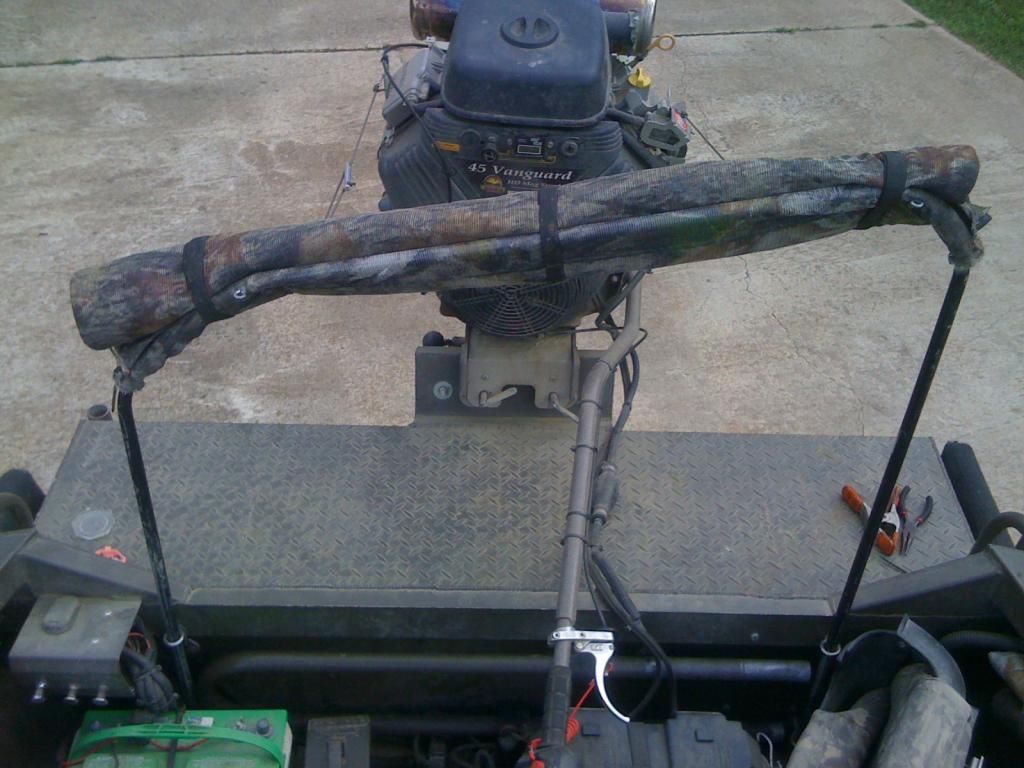
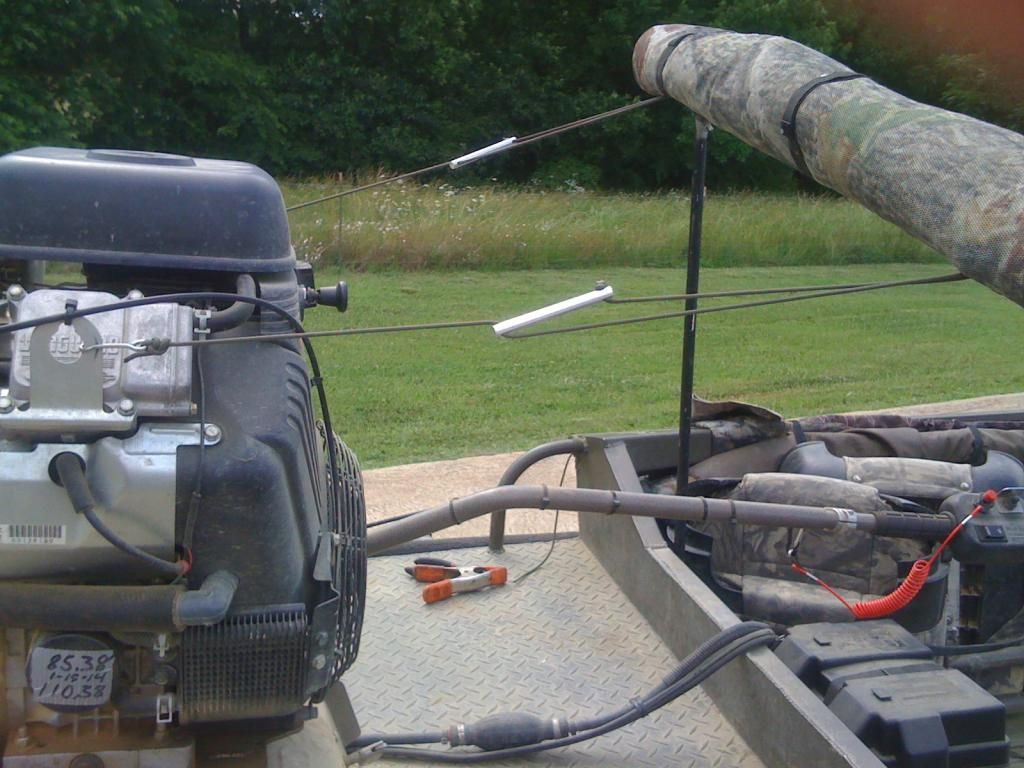
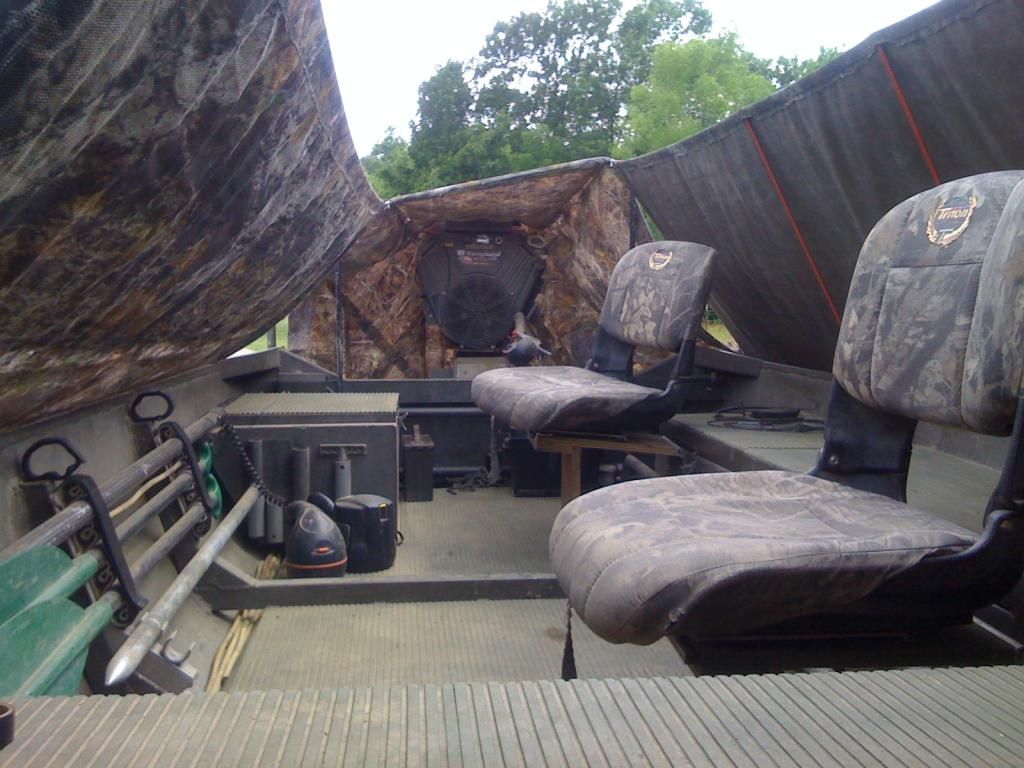
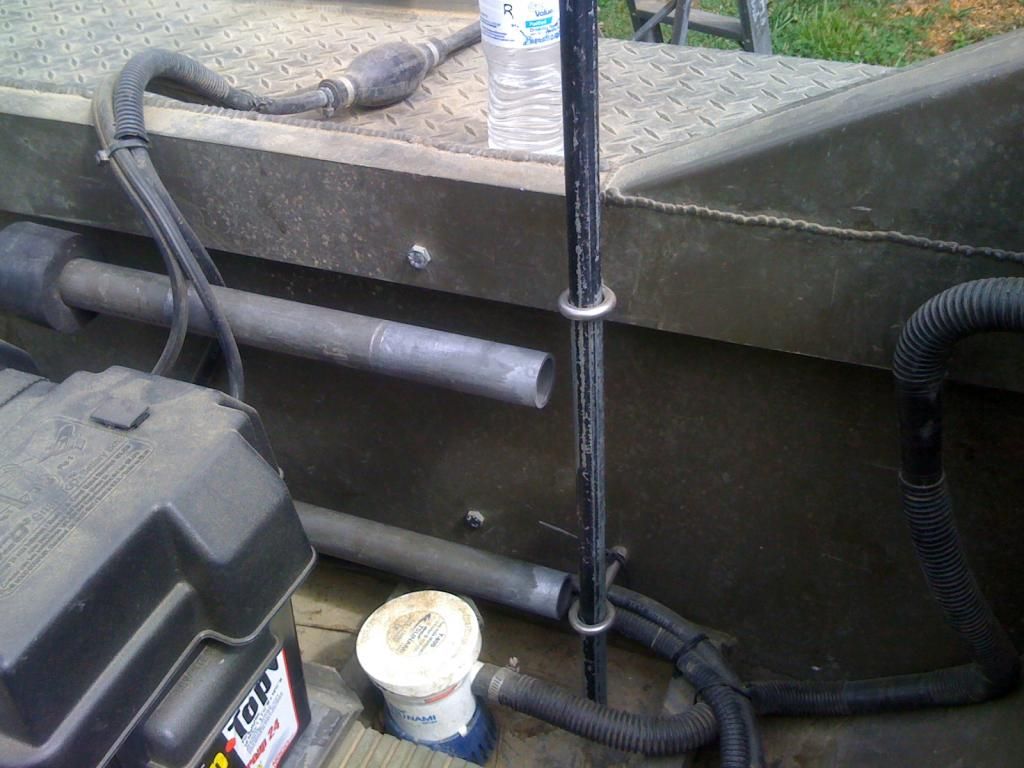
I can tell you this: The compression members are the conduit hoops. The tensile members are the parachute cord (or everything else including the nets). The most tension is on the parachute cord between the hoops because of the weight of the nets (especially when 'wet' and/or loaded with vegetation). To counteract those forces, there are parachute cords attached to the opposite side of the hoop that anchor to static points like grab rails, cleats, or eyebolts threaded into the metal in various places. The 'transfer' (forces) cords on the aft hoop actually have take-up blocks like you would use to adjust tension on tent ropes - these have screen latches on the end of them and hook on the 'lift' brackets of the mud motor. You get everything else 'up', hook the cords onto the lift brackets and hit the tilt switch on the motor to pull the right amount of tension in the whole thing without bending the conduit hoops.
'Sounds complicated - and photos would help understanding........but it's very basic tension/compression members and counter-reactive forces transferred to static objects. You don't have to fumble with knots and all the parachute cord is concealed, providing a tangle-free skeletal 'web', if you will.
The biggest appeal this design holds is that the materials for the skeleton are under $100 - put as much or as little into your nets and it's really an economical alternative to factory blinds. If you're interested, you can either come look at this one, or bring your boat over sometime and I'll help you get it rigged-up or at least started in that direction.

Pretty simple, really........
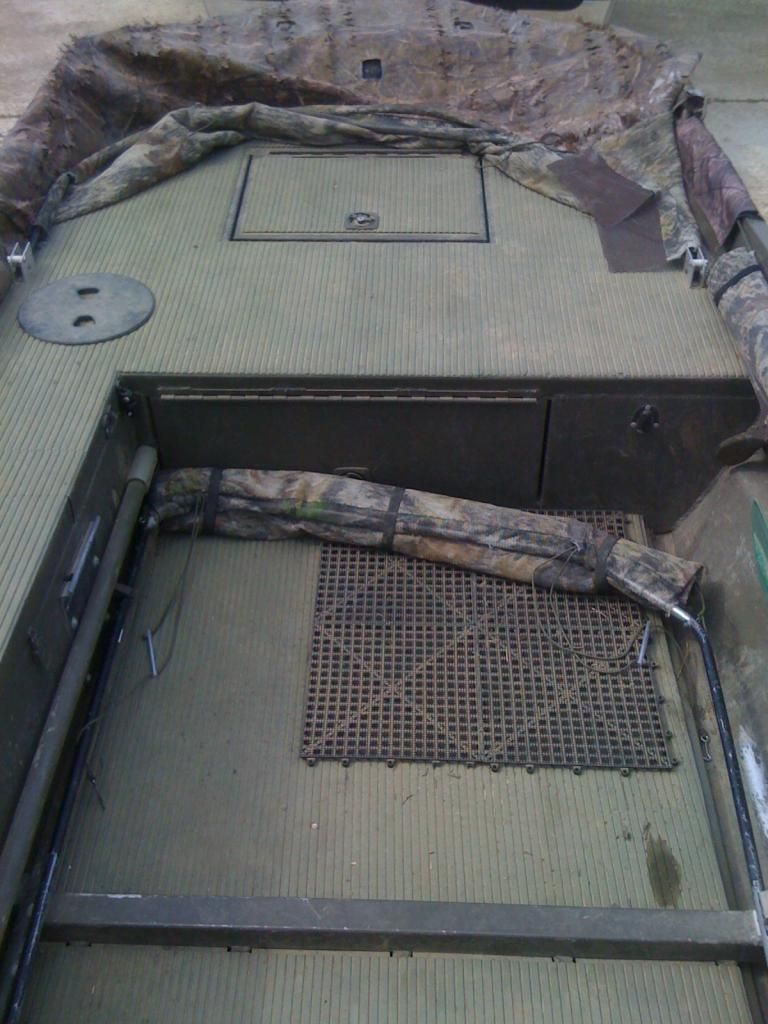
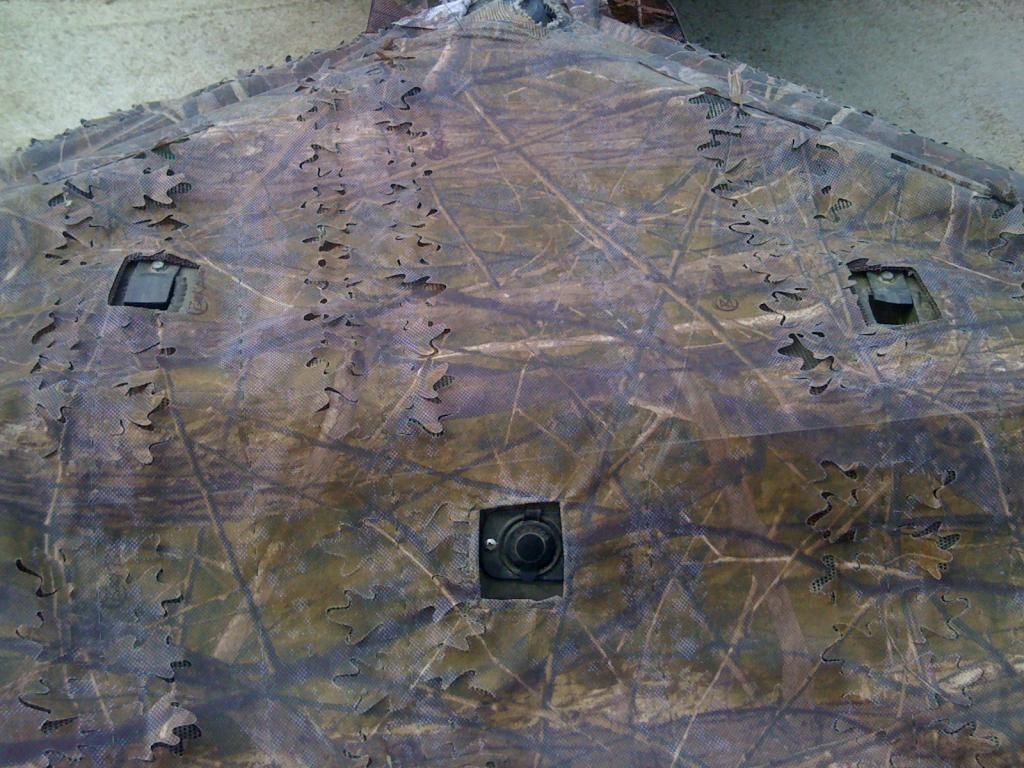
Rear hoop drops into 4 1-1/4" eye bolts threaded into the false transom and transom beam.
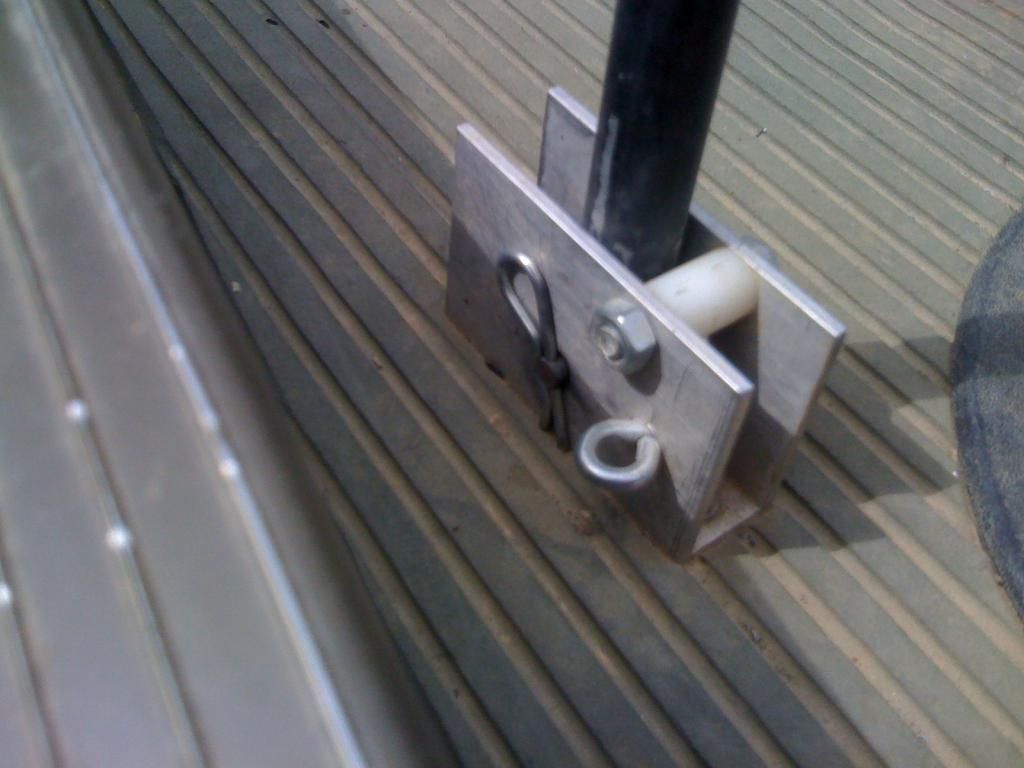
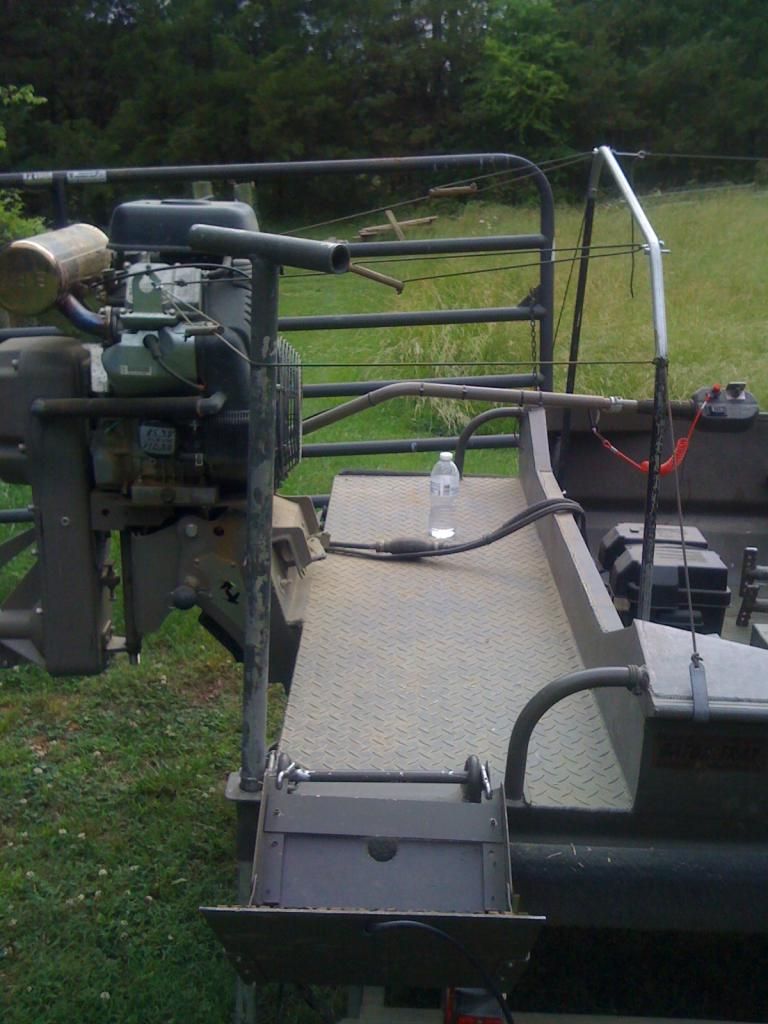
Front hoop hinges on homemade aluminum brackets and folds flat on the deck when not in use. You can actually walk on it on the front deck without hurting anything or tripping on it. [I still need to radius the corners of the brackets off - that's on 'the list'] The clevis pin in the bracket allows you to take the hoop off during fishing season. The eyebolt in the side of the bracket is to hook the top cord of the side net onto, for transport.
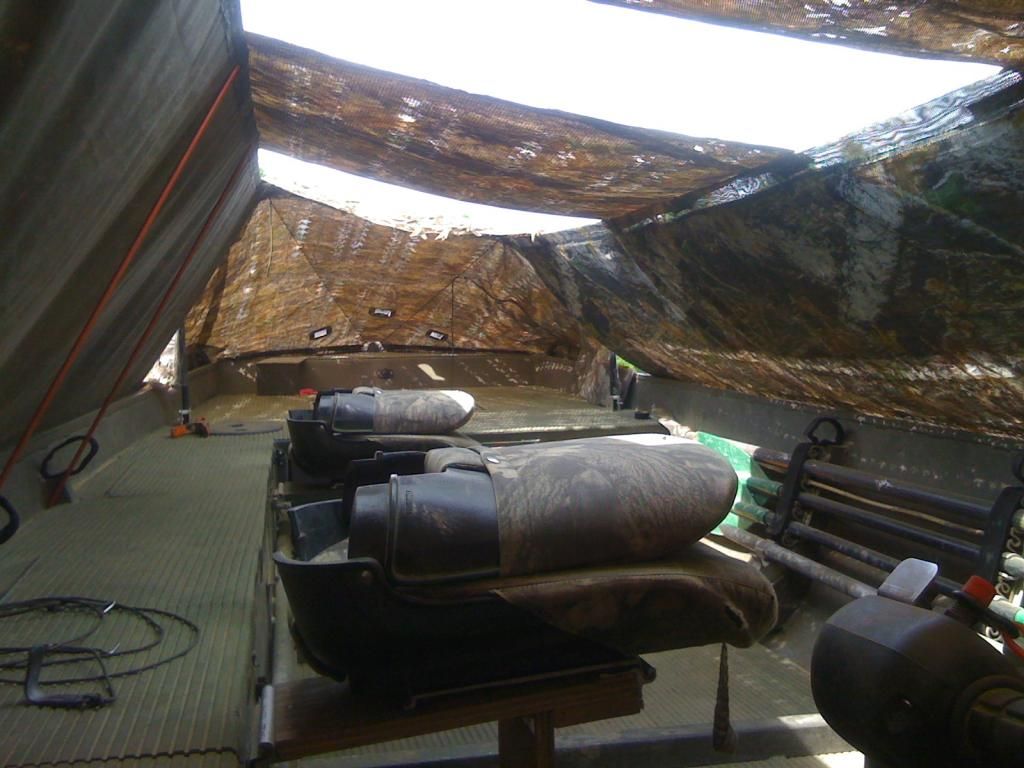
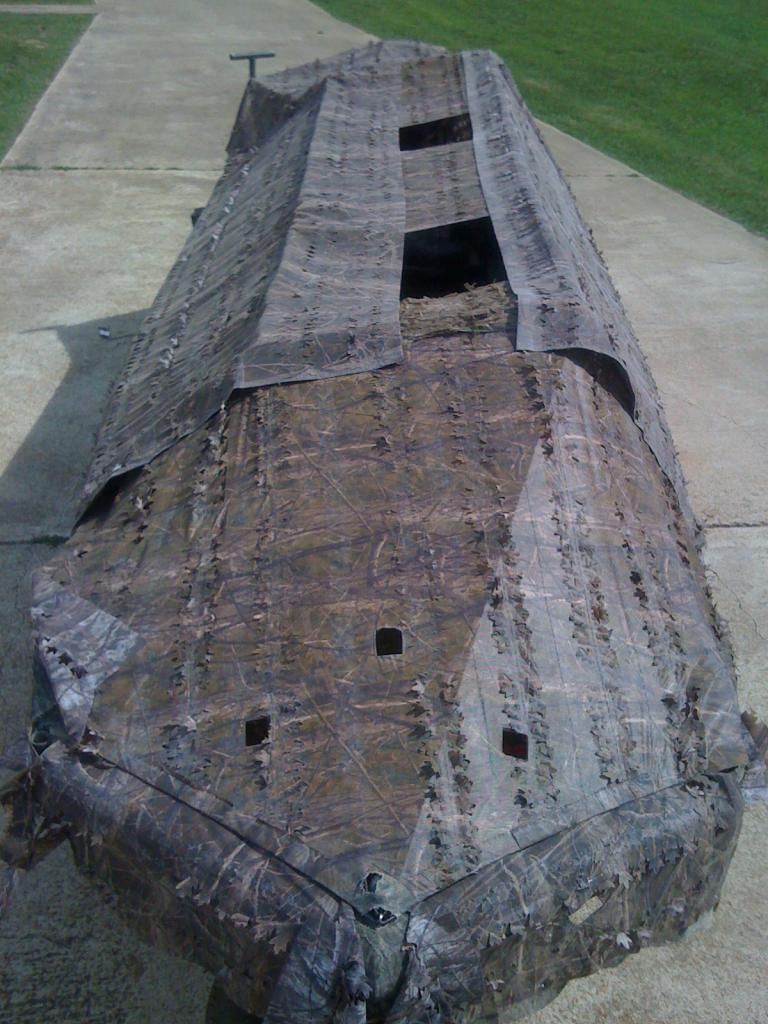
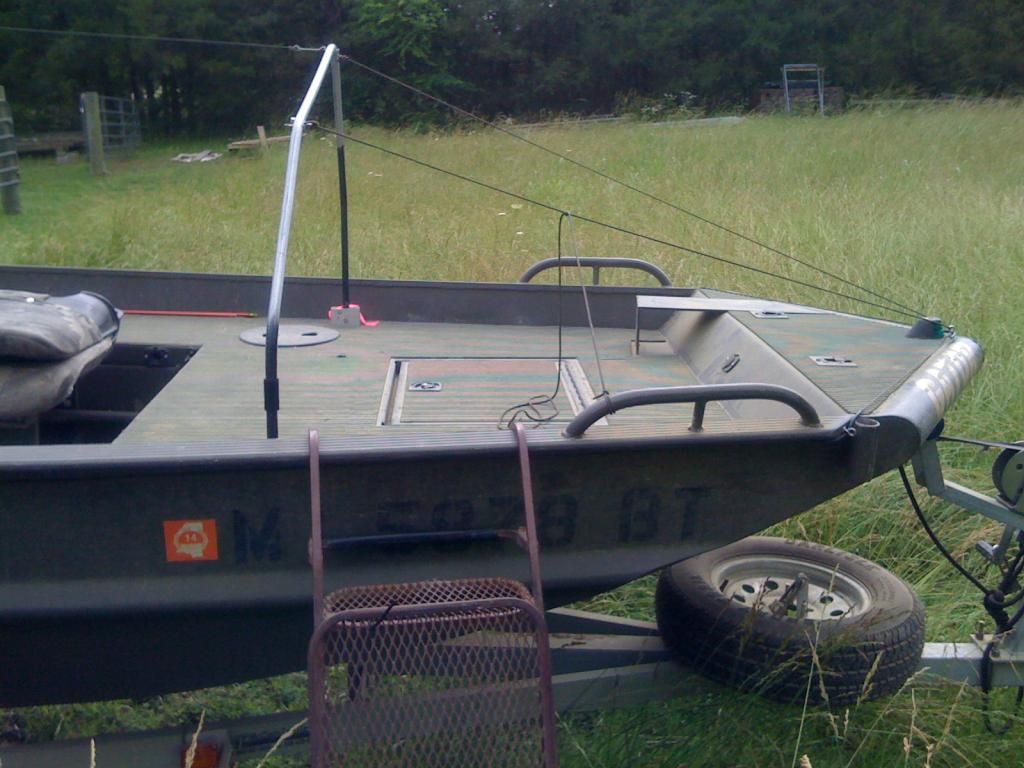
A perimeter cord holds the bottom of the nets against the gunwales and around the bow, to keep the wind from blowing them into the boat.......
It's tied-off to each grab bar on opposite sides of the hunt deck....

The line with the decoy weight hooked over the gunwale extrusion is not really necessary, but is threaded thru and helps support the rear net where it meets the side net.
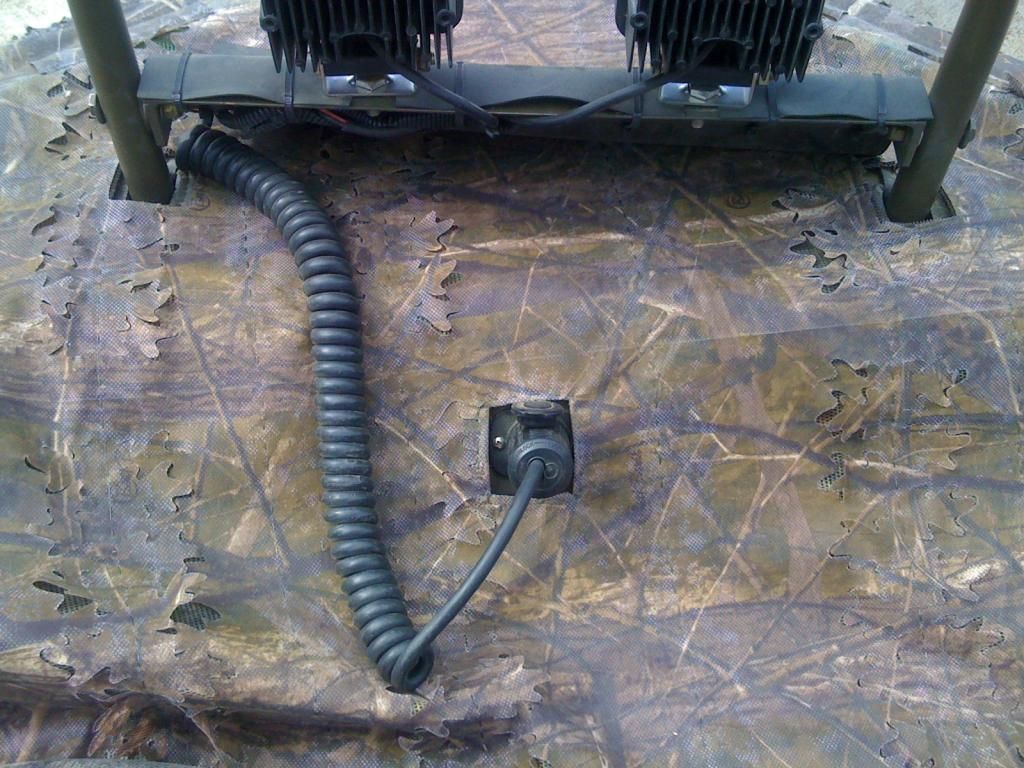
Below is a view of cord transition from gunwale to bow surface/deck......(the 1/4" black pneumatic HVAC control tubing helps protect the cord from wear on the eyelets, etc.)

..... and how everything is secured at the bow nose......

There's a hem or loop in each net that these cords (and conduit hoops) run through, to keep everything 'taught' so nothing flaps in the wind - 'don't want anything to call a duck's attention to ANY movement from your blind.
Here's a view of the connections at the rear hoop.....
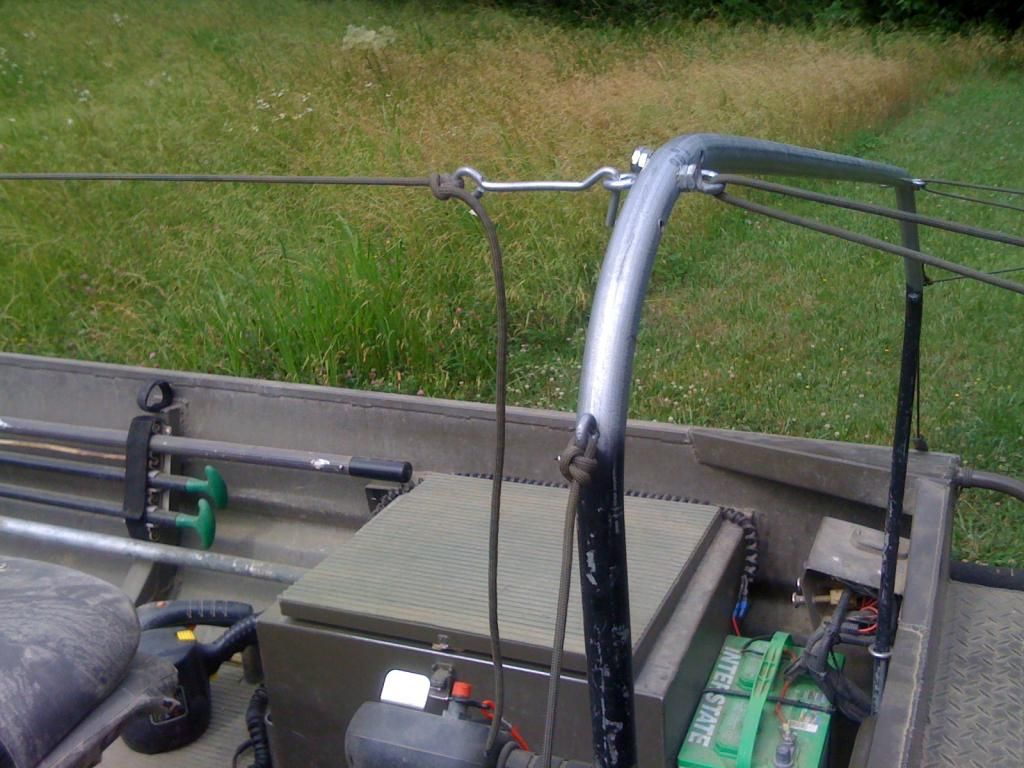
.........and a view of connections and take-up blocks that transfer forces to the engine lift brackets.
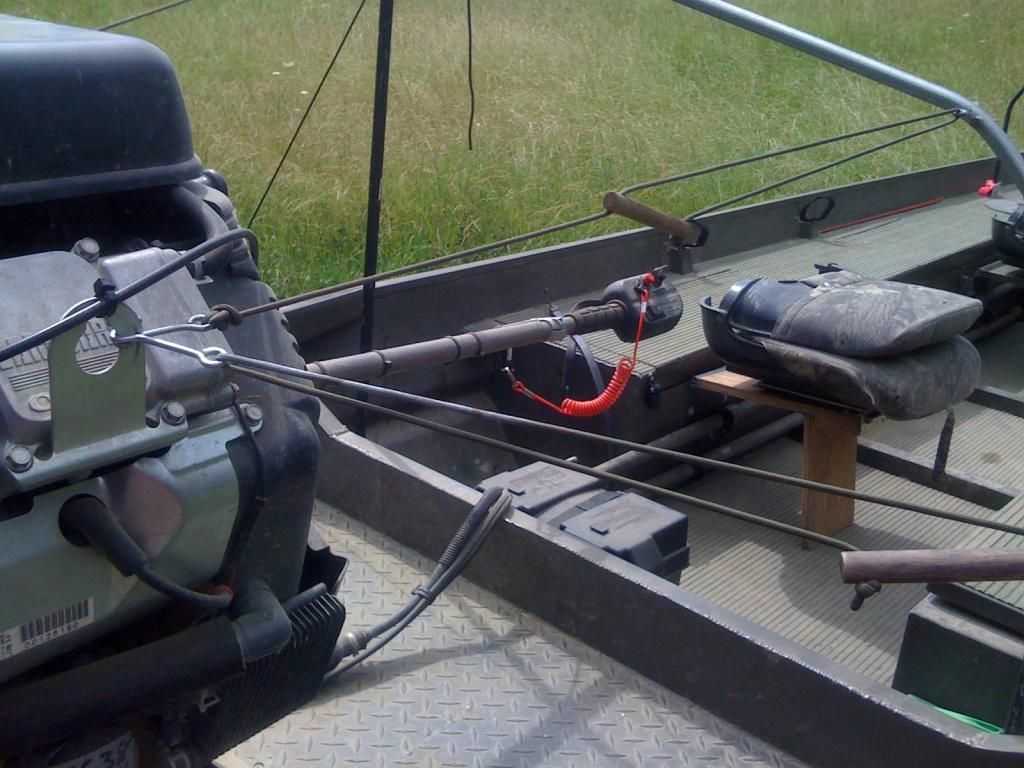
You adjust the take-up blocks according to desired prop depth in the water, then hit the trim switch to increase or decrease tension in the whole system. I've since replaced the oak dowel 'take-ups' with 3/8" aluminum roll stock to eliminate occassional split ......resulting in loss of tension (sagging nets). All of the cords and t-u blocks in the above photo are tied to the rear hoop and roll-up in the net that goes with this hoop for storage and quick deployment. No hunting for this one or that......they're all right there - just hook'em and throw the net over the motor - you're done.
Rear dog ladder (held in place by a spud pole) - the cord around the spud pole forms the covering/roof OVER the dog on the hunt deck........
Front dog ladder (folded 'up').......
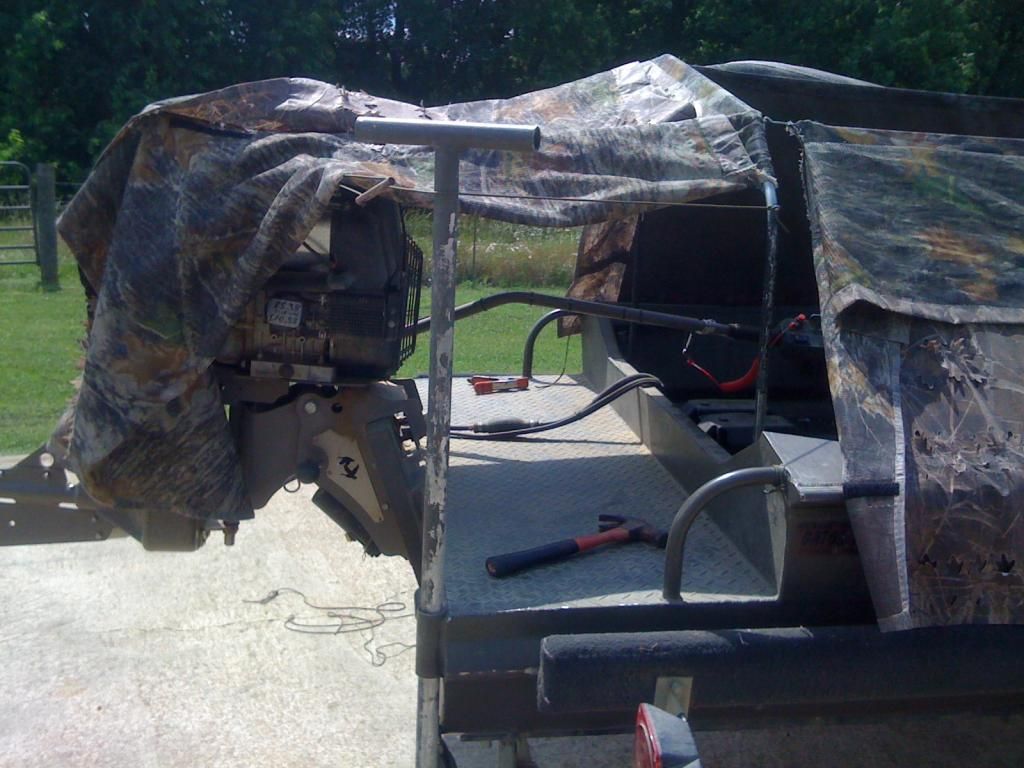
I'll eventually post some exterior and interior shots with the nets on it - and how it folds-up for storage and transport.
BTW - it's s running joke that there is a 39-step sequential set-up/take-down process .......that if you miss a step, you have to go back 5 steps and start over.....
But after 2 years of use (and refinements), I think we've gotten it down to about 20 from the time we get to the area, put-out decoys, etc.......'til the time we're ready for shooting time. It only takes about 2 minutes to set the blind up once we get the boat spudded in place. With the new nets and velcro fasteners, I beleive we can reduce that to just over 1 minute (if we don't get out of sequence).
We've used this design concept on 4 of our own duckboats since '96, plus 'jkb87' and I put one on his Xpress jon several years back. The concept is easily adaptable to most aluminum boat layouts.
There are a couple of tricky things:
- finding a good source for the bracket material (most of the larger glass companies have left-over 1" x 2" U-channel) Everything else is available at most hardware stores.
- bending the conduit - I figure-out how large the cockpit opening needs to be, how tall I want the blind (port and starboard - one side is lower - or they can be the same height if you prefer), figure-out how the hoops attach and how they rest relative to your boat configuration and other objects.......then transfer dimensions and trace it out on a sheet of visqueen with a marker, then bend the hoop(s) to that pattern.
- Getting enough tension in the perimeter cord - you just string the cord everywhere except the nose hook, putting as much tension in the line as you can. Tie it off good. Then get a claw hammer and pull the cord over the bow hook. If you can't play a tune on it - it's not tight enough